
Orchestrator是一款提供页面和命令行和MySQL高可用和复制拓扑关系管理工具,可以用其方便的管理和调整拓扑结构。著名交友网站“Github”也使用了Orchestrator进行了MySQL高可用拓扑结构的管理。
除了直观的展示拓扑关系外,还能进行主从、双主等花式切换,只需在页面上进行节点的拖拽,就能完成切换,可以说非常直观有效。
一、安装部署
(1)下载安装
下载Orchestrator的安装包,解压后编辑orchestrator.conf.json文件:
1
2
3
4
5
6
7
8
...
"MySQLOrchestratorHost": "127.0.0.1",
"MySQLOrchestratorPort": 3306,
"MySQLOrchestratorDatabase": "orchestrator",
"MySQLOrchestratorUser": "orchestrator",
"MySQLOrchestratorPassword": "orch_backend_password",
...
(2)授权
Orchestrator的元数据信息需要使用MySQL或者Sqlite进行管理,所以需要在数据库中授予相应的权限.
Orchestrator所需的元数据库建库:
1
2
3
4
CREATE DATABASE IF NOT EXISTS orchestrator;
CREATE USER 'orchestrator'@'127.0.0.1' IDENTIFIED BY 'orch_backend_password';
GRANT ALL PRIVILEGES ON `orchestrator`.* TO 'orchestrator'@'127.0.0.1';
添加的实例数据源授权:
1
2
3
4
5
CREATE USER 'orchestrator'@'orch_host' IDENTIFIED BY 'orch_topology_password';
GRANT SUPER, PROCESS, REPLICATION SLAVE, RELOAD ON *.* TO 'orchestrator'@'orch_host';
GRANT SELECT ON mysql.slave_master_info TO 'orchestrator'@'orch_host';
GRANT SELECT ON ndbinfo.processes TO 'orchestrator'@'orch_host'; -- Only for NDB Cluster
权限说明:
REPLICATION SLAVE is required for SHOW SLAVE HOSTS, and for scanning binary logs in favor of Pseudo GTID RELOAD required for RESET SLAVE operation PROCESS required to see replica processes in SHOW PROCESSLIST On MySQL 5.6 and above, and if using master_info_repository = ‘TABLE’, let orchestrator have access to the mysql.slave_master_info table. This will allow orchestrator to grab replication credentials if need be.
(3)启动
1
2
cd /usr/local/orchestrator && ./orchestrator --debug --config=/path/to/config.file http
参考:https://github.com/openark/orchestrator/blob/master/docs/install.md
二、使用介绍
2.1 基础面板
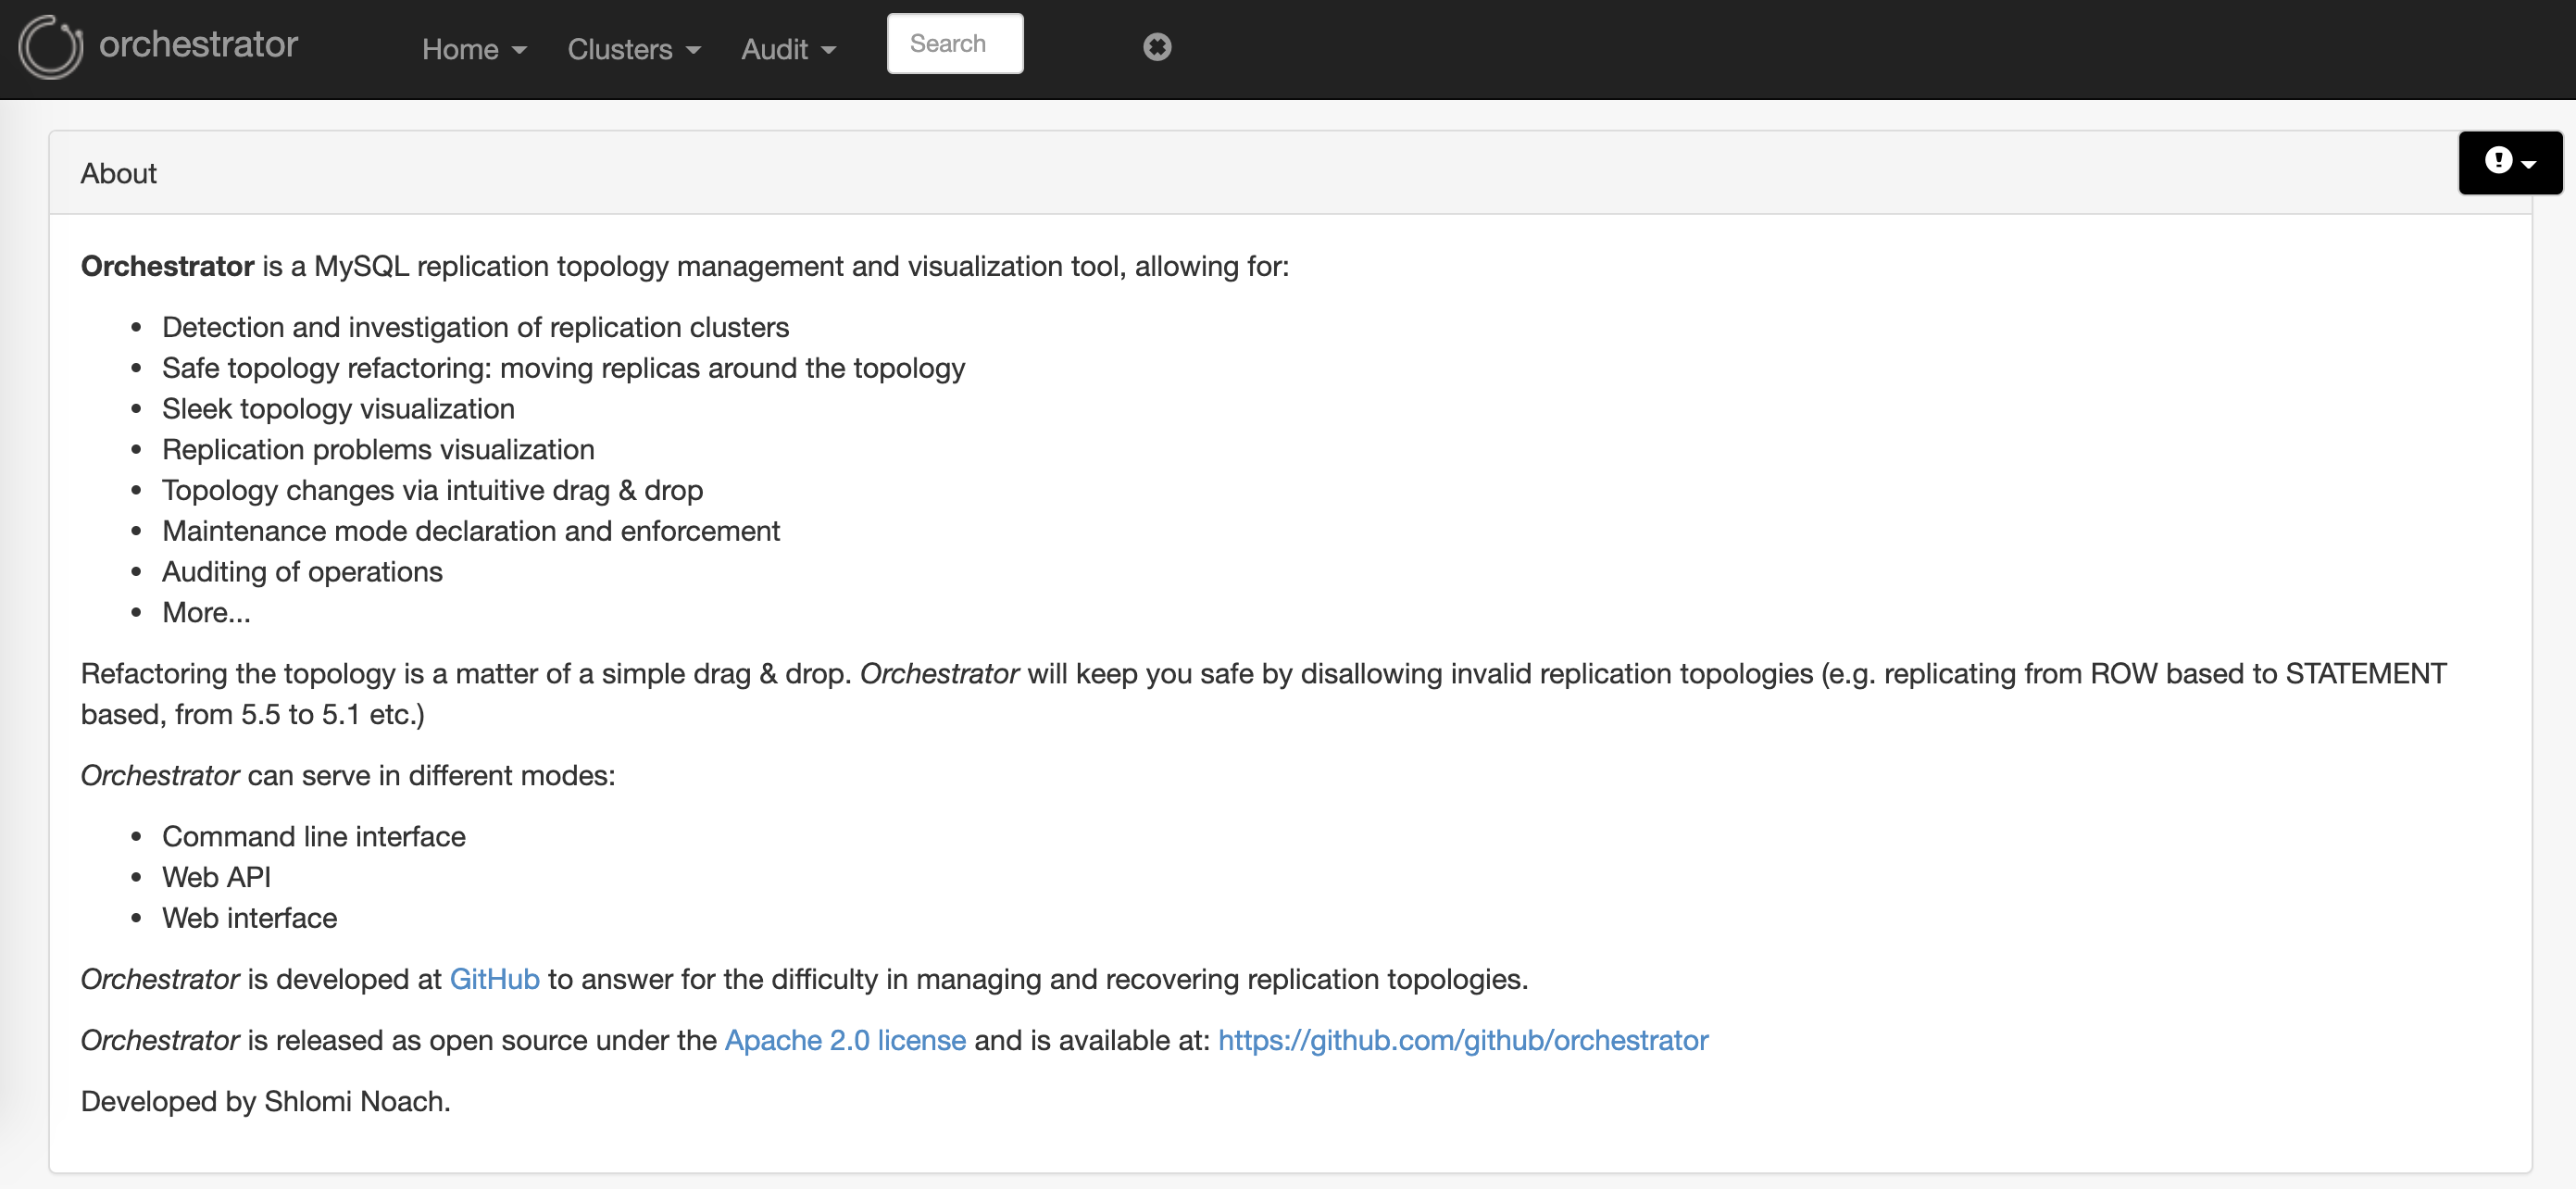
安装完成后,打开页面(默认端口为3000),Home —-> About中有Orchestrator的介绍:
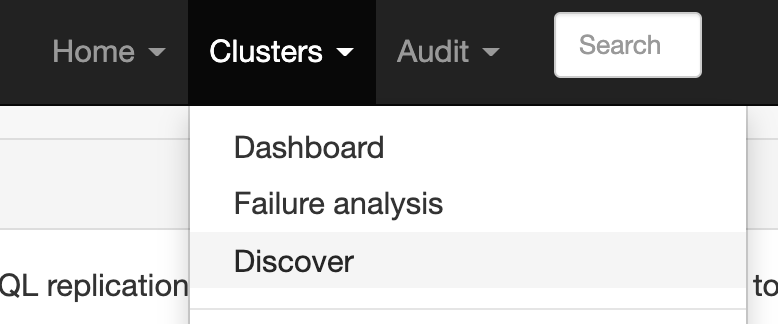
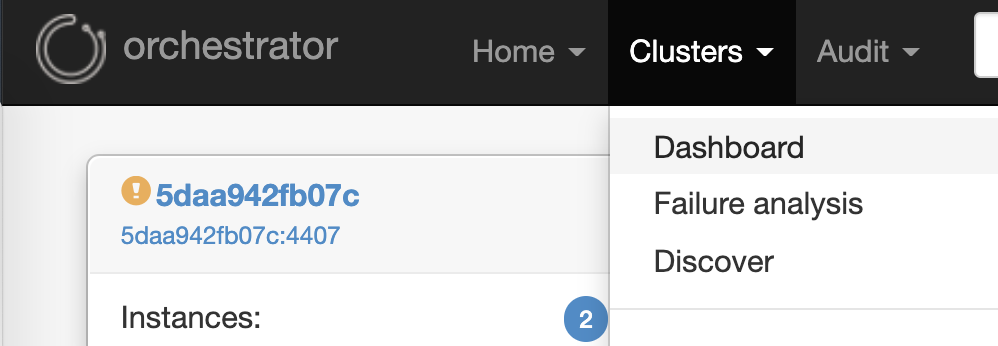
选择Cluster —-> Dashboard,即可看到集群的拓扑情况。
(1)展示
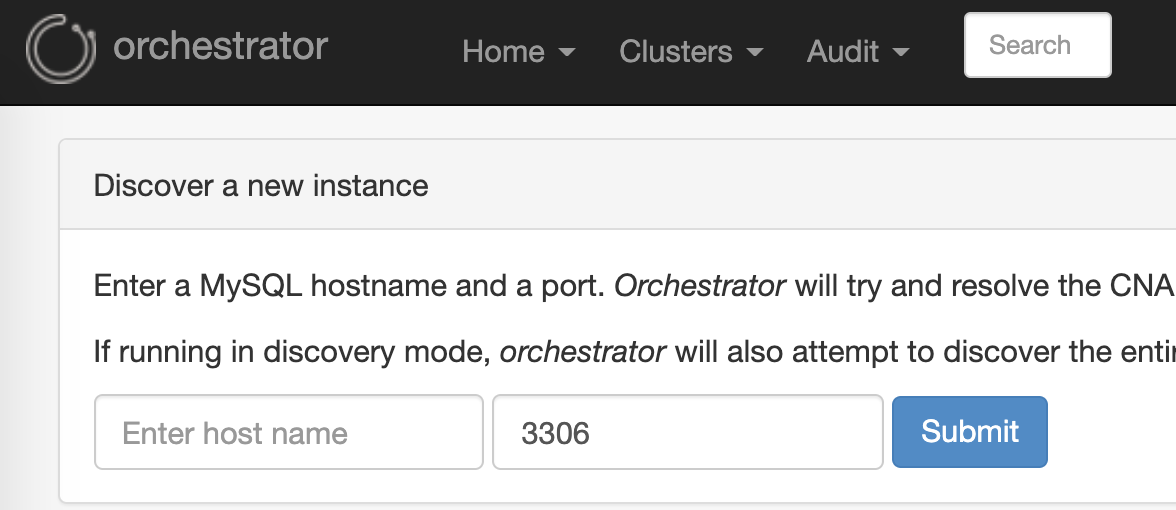
部署好一个主从集群,添加到Orchestrator中:在Orchestrator中选择Cluster—->Discover:
填写数据库的信息:
若填写的是从库的信息,则会自动把主库实例也添加进来(show slave status得到的主库的信息),可以看到新添加的集群的Instances = 2:
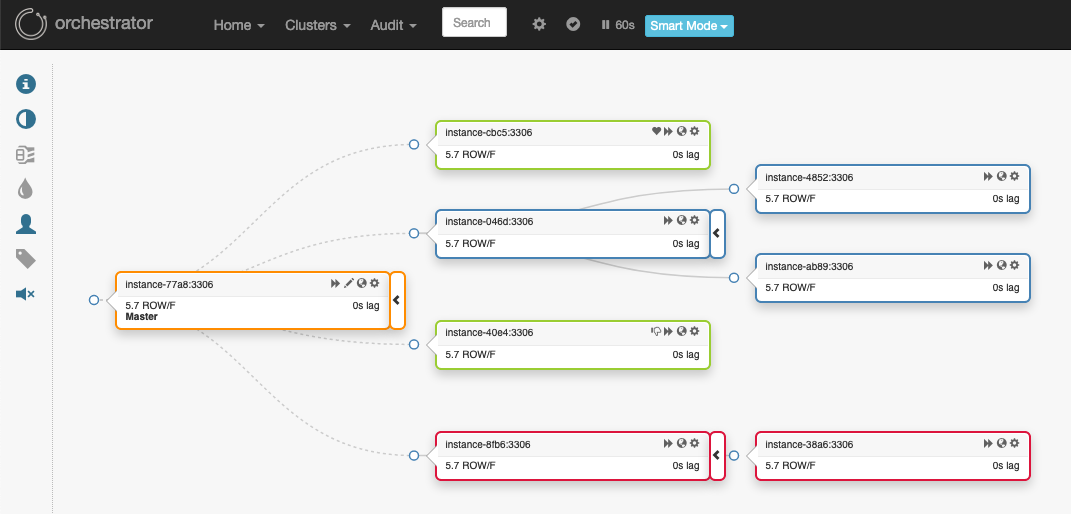
在Cluster —-> Dashboard中,选择需要管理的集群,进入后,即可看到拓扑情况:

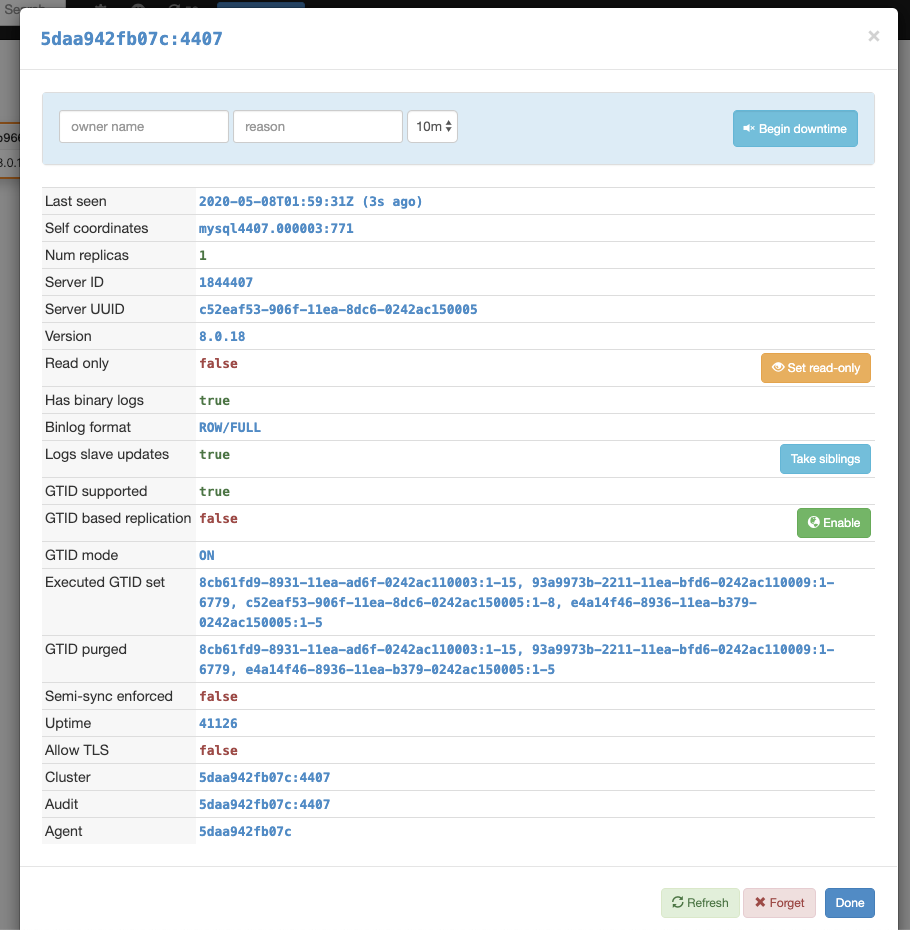
点击各个节点上的设置按钮,可以看到节点连接的详细信息,并且可以修改其中的部分配置:
2.2 基础测试
(1)主从 —-> 双主
Orchestrator在切换时,并不是暴力的进行切换,而是会去避免出现数据不一致的情况。例如若需要将主从 —-> 双主的时候,会提示需要先将原来的从库设置为read-only,才能切换为双主:
切换后,需要重新在Cluster —-> Dashboard中,选择集群,即可看到已经修改为了co-master集群。
若需要交换主从,则需要进行再次切换,主库上stop slave后,将原主库拖拽到从库后,即可。
(2)同级从库 —-> 级联主从
即B,C均为A的从库,现把C切换为B的从库,得到A —-> B —-> C的集群架构:
以上介绍了两种常见的情况,当然还有很多花样的切换方式,均可进行拖拽完成,Orchestrator支持命令行的方式进行切换,方便更加自动化的切换维护。
三、命令行
3.1 列出集群
1
2
3
4
5
6
bash-4.4# orchestrator-client -c clusters
2bd38a52527e:5502
3a95cdf097fd:4407
5daa942fb07c:4407
70b353672cdc:5501
3.2 查看集群状态
1
2
3
4
5
bash-4.4# orchestrator-client -c replication-analysis
5daa942fb07c:4407 (cluster 5daa942fb07c:4407): ErrantGTIDStructureWarning
2bd38a52527e:5502 (cluster 2bd38a52527e:5502): DeadMasterWithoutSlaves
3a95cdf097fd:4407 (cluster 3a95cdf097fd:4407): DeadMasterWithoutSlaves
3.3 查看拓扑关系
1
2
3
4
bash-4.4# orchestrator-client -c topology-tabulated -i 5daa942fb07c:4407
5daa942fb07c:4407  |0s|ok|8.0.18|rw|ROW|>>,GTID
+ b96697e765cc:4408|0s|ok|8.0.18|rw|ROW|>>,GTID
3.4 主-主结构
1
2
orchestrator-client -c make-co-master -i test1:3307
3.5 同级slave变为自己的slave
1
2
orchestrator-client -c take-siblings -i test3:3307
3.6 将实例转换为自己主人的主人,切换两个:take-master
1
2
orchestrator-client -c take-master -i test3:3307
3.7 将slave在拓扑上向上移动一级
对应web上的是在Classic Model下进行拖动:move-up
1
2
3
bash-4.4# orchestrator-client -c move-up -i b96697e765cc:4408 -d 5daa942fb07c:4407
b96697e765cc:4408<5daa942fb07c:4407
参考:
https://github.com/openark/orchestrator/blob/master/docs/executing-via-command-line.md
相信看了那么多图,觉得想要蠢蠢欲动想要操作一把,原来数据库的维护也可以如此简单直观,可以说是很贴心的一个工具了。
欢迎关注公众号:朔的话: